Idealpos supports two different ways of using the Hold Print Function.
You can either use Hold Print by assigning an Order Number to a sale and holding the print job from the Kitchen until you're ready to send it.
Or you can utilise the Hold Print function from the Table Map.
This topic outlines the required Yes/No Options that need to be configured to enable and use this function on the Table Map.
Note!
This topic assumes that your Kitchen Printers are already configured as well as the printer settings on each Stock Item that needs to print to the Kitchen Printers
Kitchen Printers are configured via Back Office > Setup > Network Printers.
Stock Item Printer Settings are configured in each Stock Item via Back Office > File > Stock Control > Stock Items > Select an Item > Modify > Enable the required Printer checkboxes.
The item will print to the selected printer(s) when it is either saved to a table or when tendering a sale that contains the item.
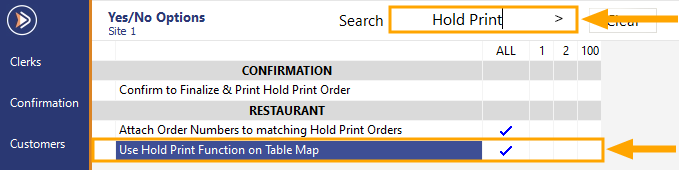
Go to: Back Office > Setup > Yes/No Options
Enter "Hold Print" into the search field, then enable "Use Hold Print Function on Table Map"
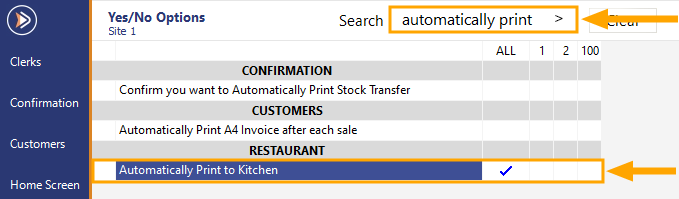
In order for the Hold Print function to work correctly, you will also need to ensure that the Yes/No Option "Automatically Print to Kitchen" is enabled.
Enter "automatically print" into the search field, then enable "Automatically Print to Kitchen".